DIY PROJECT: CRAFT/SEWING CENTER
I don’t know about you but I always find myself being drawn into whatever thrift store I happen to be passing! No matter how hard I try, I just can’t seem to avoid walking through to see if anything there speaks to me! Well not too long ago on one of these thrift store ventures I happened upon this little two-drawer chest. I had been looking for something that I could turn into a crafting and sewing station and this seemed to fit the bill (with some minor additions and modifications of course!). It was certainly priced right at $12, so why not?

Well, I took it home and looked it over to decide what modifications were needed and here is what I came up with.
Needed Modifications:
1. It needed to be a little taller so it would be comfortable to use either standing or sitting on my stool.
2. It needed a bigger work surface.
3. I wanted it to be mobile.
4. I needed additional storage options in addition to just the drawers it already had.
Solutions:
1. Taller was easy and actually tied in with making it mobile. I built a little frame on the bottom of the piece so that casters could be added on. The frame and casters added just about the right amount of additional height I wanted.

2. Also an easy one, I took a 2’ x 4’ piece of plywood and screwed it directly onto the existing top using four screws that were countersunk. This gave me another 3/4" of height and a much larger work surface.

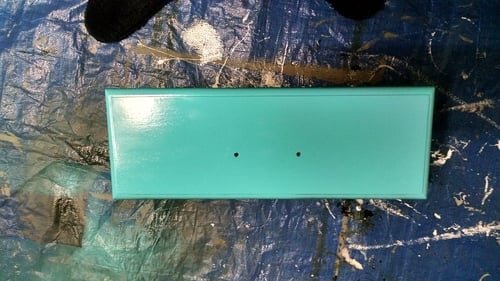
3. Mobile was addressed by adding the frame to the bottom and then drilling holes and adding casters. ***See above photo.
4. I knew exactly where my work station would be located most of the time so adding a 2 ’x 4’ piece of pegboard to hang directly over my base cabinet made for the perfect answer here.
In addition to these steps, I needed to refinish the piece and make it fit my décor. I wanted it to look fresh and fun so I chose these colors and painted the main part of the piece white and the drawers and base frame the fun teal color. All that was left was to change out the drawer handles to something a little more modern.
This whole project came together for right around $40, total and if you have ever priced these crafting/sewing stations, you know that’s a great deal!
I did have to buy plywood that only had to be good on one side (around $9), which brings the price down. I also bought the piece of pegboard (around $8). We had some casters on-hand and 2 x 4s to make the bottom frame. I ALWAYS have plenty of paint lying around so there wasn’t so I had the white I needed. I bought two cans of teal spray paint for the frame and the drawers (about $4 a can), a variety pack of hangers to use on the pegboard for around $8, and two new drawer pulls for about $2 a piece.

This project isn’t difficult, and you can certainly customize your work station to accommodate the types of crafting and DIY projects you do the most. The best part is you can take a sad little piece of furniture from your local thrift store and give it new life! Yay for repurposing! Every time I walk into my office, the work station makes me smile!
Now, what will you do next to love where you live?