DIY Storage Project
Intro to the laundry room project…
What do you get when you take a run-down, falling-apart, completely ugly shelving unit and apply a little TLC and DIY magic? The answer is amazing. You get an amazing solution to the common problem of needing more storage in your laundry room. Or an amazingly cute piece to create an instant mudroom space. Move over ugly duckling. It’s time for the tale of the ugly shelving.
And So It Begins
Inspired by a great idea to turn ugly, used bookshelves into useful and cute laundry room storage, I was on a quest. All I had to do was find the shelves. Should be easy, right? I mean we see old shelving units in thrift stores all the time, right? Well, Murphy’s Law was at it again, and it took me several weeks of hunting before I found the all-wrong shelves that were perfectly suited for this project. The good news: they were only $20. The bad news: I’ll let pictures tell the story…
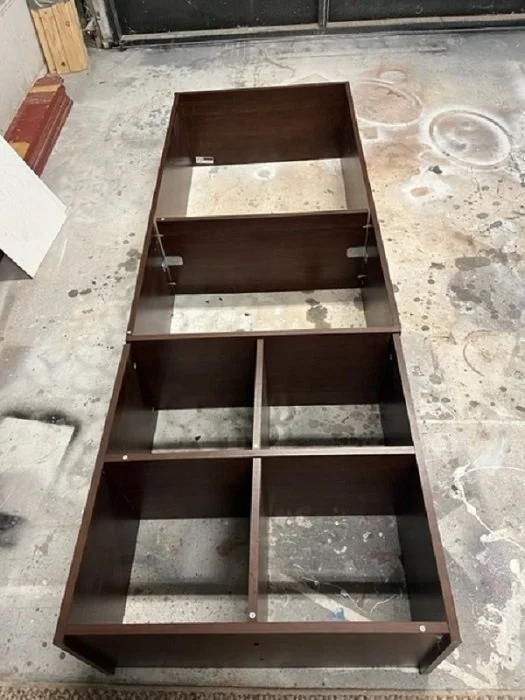
The shelves were in bad shape. We had to lay them down to work on them and take them apart.
Project Steps:
1. Prep the shelves. This step will mean different things to different people, depending on the condition of the shelves you find. Mine were in bad shape, so prepping meant taking them apart, cleaning them, sanding them, and preparing them for painting.
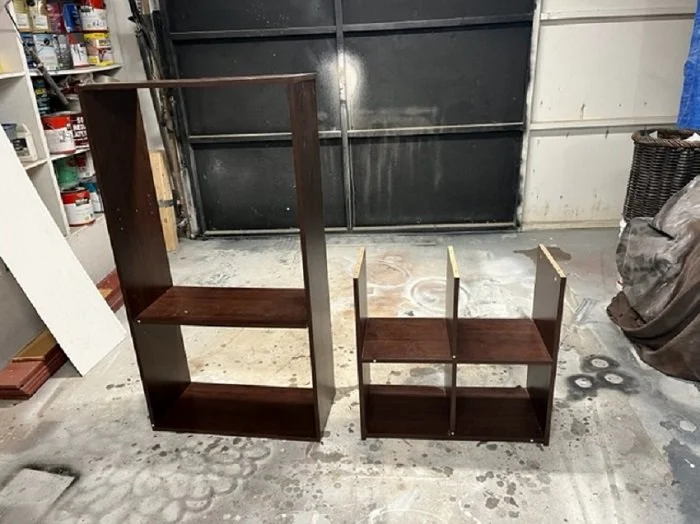
Now it was much easier access to clean, sand, and paint.
2. Paint the shelves. I used chalk paint for this task because the shelves had an ugly faux wood laminate. I’m a believer in the concept that chalk paint covers all! Be prepared to apply several coats with light sanding in between each coat to get good coverage and durability. I made my own chalk paint with plaster of Paris. You’ll find the recipe at the end of this blog.

It took three coats to get good coverage on this piece.
3. Put the shelves back together. (I can’t help hearing Gene Wilder’s voice in Young Frankenstein when I read that last sentence: Put the candle back.) These shelves were not assembled properly to begin with, so putting them together including making them straight – for probably the first time. I added a backer board to help give them stability. The original backing was cardboard and was literally falling off. I had beadboard left over from another project that worked quite well after being painted. Next came some molding around the top and on the front shelf to give the piece a more finished look. The bottom cubbies required no trim, which would actually impede cubby movement – and we can’t have that!
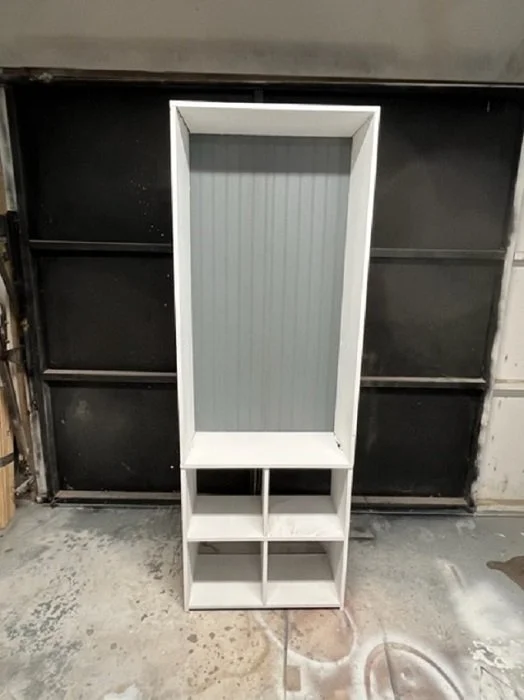
When working with the two pieces to get them back together, some paint got damaged and had to be touched up once the whole piece was done.
4. Make final additions. Because I wanted this piece to work in a laundry room, I secured a bar across the top to provide space to hang a few clothes – maybe those items that didn’t quite dry thoroughly in your dryer load. I used an old shower curtain rod we had squirrelled away in the garage. We trimmed it to size and used cup rod holders mounted to the inside for support. Finally, I purchased four fabric cubes for the cubbies. These can be found online, at your local discount store, or even at some Dollar Stores.

The only step left here was to add the hanging bar, otherwise, it was done!
The Big Reveal
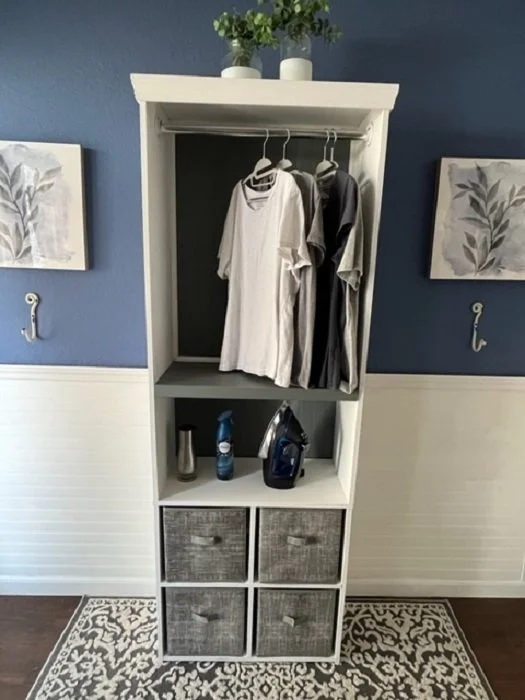
Here is the finished product! I think it turned out well. Hard to believe it’s the same sad shelves from above!
Now she’s done and didn’t she turn out nice? What a great piece to add some additional storage to a laundry room. Yes, for some unknown reason, I always refer to my furniture pieces as “she.” Furniture is solid, supportive, beautiful – seems fitting.
Closing Thoughts
SAFETY NOTE: Make sure you secure this piece to the wall so it can’t be easily tipped over. You can find safety straps for this purpose in any home improvement store.
I love taking sad, discarded furniture and giving it new life. I hope this project inspires you to do the same. It’s all about redesign!
Chalk Paint Recipe:
3 parts flat paint
1 part Plaster of Paris (available in discount and home stores in the paint department)
Enough water to dissolve the plaster of Paris
Put plaster in a container and dissolve with water, stirring well
Add your paint and stir, stir, stir to mix it all together
Depending on the consistency of your paint, you may need to add a little more water or a little more Plaster of Paris. You’re looking for a thick, smooth consistency that will go on smoothly.
Now, what will you do next to love where you live?
Please feel free to reach out to us at The Redesign Habit and ask questions or simply share a project that you are working on or have completed.
For more great stories and ideas please follow us on Facebook and Instagram.