5 HALLOWEEN DECORATIONS SO CHEAP & EASY IT’S SCARY!
BOO!!!! Okay, sorry, I just wanted to set the tone for this blog! This time of year many of us are thinking about what we can do for Halloween décor. With Halloween on a weekend this year, more us will be hosting parties on that ghostly night and if you are like me and time is short, these ideas may help spark your motivation to make some of your own decorations and save some money that you can put toward more important party purchases….like wine! (Maybe that’s just me...).
As a side note, all of the items used in these crafts were $1.00. Yes, I do love the dollar stores and dollar bins at Target! Okay, let’s get to the good stuff!

This first décor item is just too cute! Little pumpkin bats. These bats are made from artificial pumpkins so they can be used again. You can make them with real pumpkins too, just be sure an poke holes in them so they don’t mold on you.
The process is simple:
1. Paint your pumpkin black.
2. Cut bat wings out of black poster board to fit the size of your pumpkin body.
3. Attach wings with glue gun.
4. Add google eyes.
DONE! How easy was that. If you don’t have access to cheap google eyes, you can always paint on your eyes as well.

This next one is even easier than the first one! I know…what?! Anyway this is a fun one to put out to greet your guests as they arrive for your party or to add some spooky outdoor fun for your trick-or-treaters!
Here are the steps:
1. Use either empty toilet paper rolls painted black or roll your own tubes out of black poster board.
2. Cut out spooky eye shapes in your black tubes.
3. After it gets dark outside, take colored glow sticks and stick them inside the tubes and nestle them in your bushes outside.
That’s it and they are so darn cute!

For this décor item all you need are cute Halloween shaped placemats. The dollar store here had tons to pick from. I got one orange and one black and added the google eyes to the little spiders around the web and then added a cute sticker in the middle. These stickers are glow-in-the-dark so if you hang outside, you’ll get that as an extra bonus. On the orange mat, I also attached some little rubber bats that came three in a package for a buck at the dollar store. These place mats are great because you can decorate them anyway you want to and in about ten minutes you have a wall or door hanging for just a few bucks! Can’t beat that!

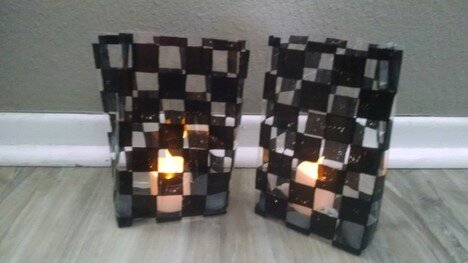
These cute little decorated jars can be multi-functional depending on what you want to use them for. You could use them for luminaries set around your tables. If you go this route, be sure and use the flameless battery-operated candles so you have no safety concerns. You could also use them to hold silverware or napkins on your party table.
Here’s the process:
1. Take your empty jars and cover the outside with colored or patterned tissue paper. Fold it flat in the back and glue your seam. Trim around bottom.
2. Cover top of jar with cute ribbon to give it a finished look.
3. Decorate anyway you want to. I used stickers on one and drew a face on another and used google eyes. The third one I just left plain because the paper was patterned.
4. Place candles or utensils in and you are DONE!
TIP:
You can buy flameless battery powered candles super cheap at the dollar store too!
This last one is almost embarrassing it’s so easy. Target had cute little treat bags in their dollar bin…10 bags for 1.00 and I couldn’t resist doing something with them so I made luminaries!
Here’s how:
1. Open your bag and fill the bottom 1/4 of the bag with either sand or small pebbles.
2. Take your flameless, battery powered candle and place in bottom.
How cool is that? Each one of these luminaries cost me about .20 apiece because I got my candles in a ten-pack at the dollar store and the gift bags came ten in a package so a dime a piece there. Set them out to line your walkway or place around your house inside to add a spooky glow!
Okay, hopefully this blog will help inspire you to make some of your own spooky décor this year. My best advice is to ALWAYS check the dollar stores and discount bins in your favorite department store and think a little outside the box!
Now, what will you do next to love where you live?