Saving an Unsavable Piece of Furniture
This is a furniture makeover challenge I issued to myself. Let me set the stage…
My hubby and I recently redesigned my workshop in the garage. There was an old buffet piece I had been using as a workbench. Now, with the new workshop area, there was no longer a place for the buffet. Being a reuse and repurpose girl at heart, I couldn’t with good conscience throw out a piece of furniture (no matter how scary the current condition was) without trying to fix it up and pass on to someone who could use it. This is where the makeover story begins.
Here's a “before/scary” photo so you can see exactly what I was dealing with:
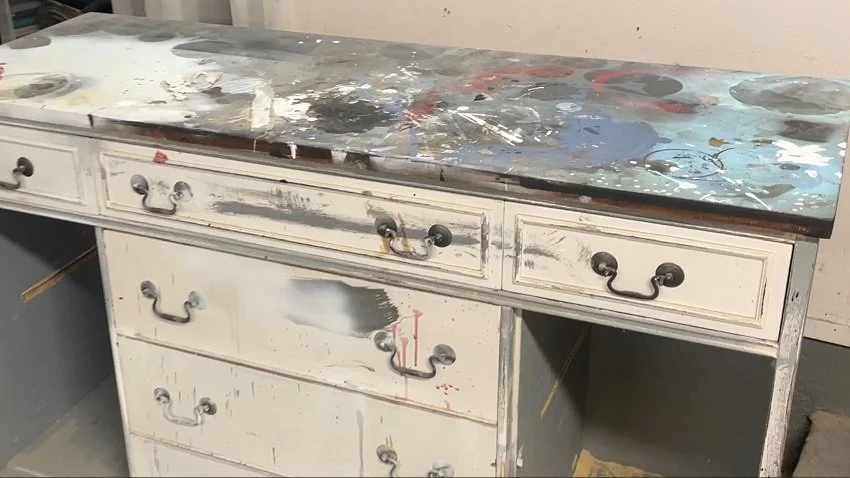
Yikes!
As you can see there was a lot wrong with this piece, but a few positives.
Furniture Fixes Needed
Repair the top or replace it
Sand everything down so the surface would take paint
Repaint
Add new drawer hardware to update the look
Find a way to cover grooves where shelves used to be
Remove the scrolled trim around the bottom that was really dating its look
Steps to Repair the Buffet
1. The first order of business was the top. Although I had completely ruined it over the years, it occurred to me we could possibly remove the top, flip it over and refinish it with the unused side up. It took some work to get it removed, and we found the flipside had some dings and “dangs.” So instead of stressing, I just distressed and then refinished it. I think the top turned out pretty dang good!
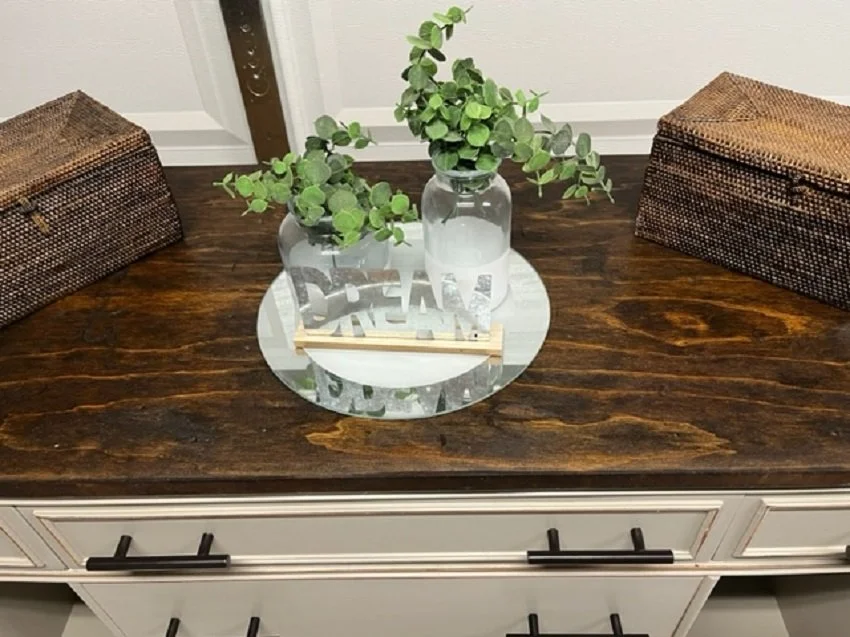
The top actually turned out great! Very rustic and beautiful…who knew?
2. The next steps, sanding and repainting, were pretty standard stuff. I chose a neutral color for wider appeal and new contemporary, bronze drawer pulls to help update the look.
3. Now, with the help of my hubby, the scrolled trim around the bottom was removed to give the buffet a much more contemporary look.
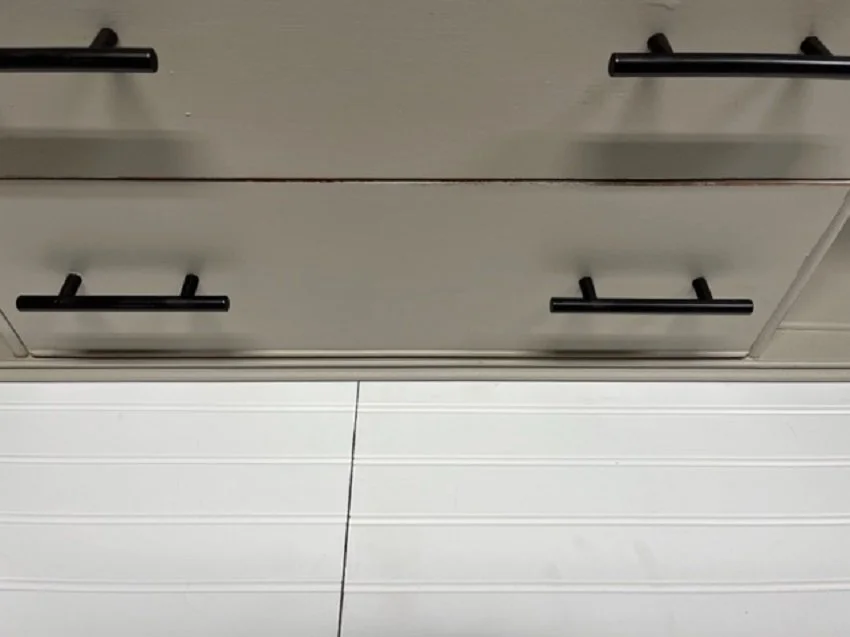
The bottom looks much cleaner and more contemporary without the scrollwork.
4. The final hurdle of covering the grooves where shelves used to be attached was done by adding small molding, painted the same color as the outside. Now the former grooves are barely noticeable. Groovy, eh?
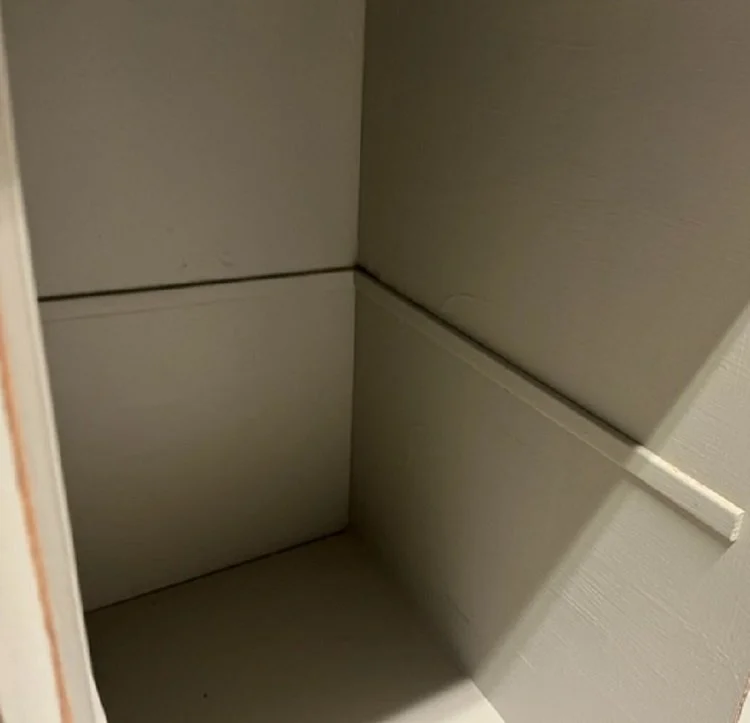
This worked well to hide the grooves where the original shelves were.
The End Result
With a little elbow grease, a small amount of money ($10 for all the new drawer pulls), and some help from my hubby, I was able to bring this piece back from the brink of the landfill. It now has new life and the best part is I know someone who can use it will now get that chance.
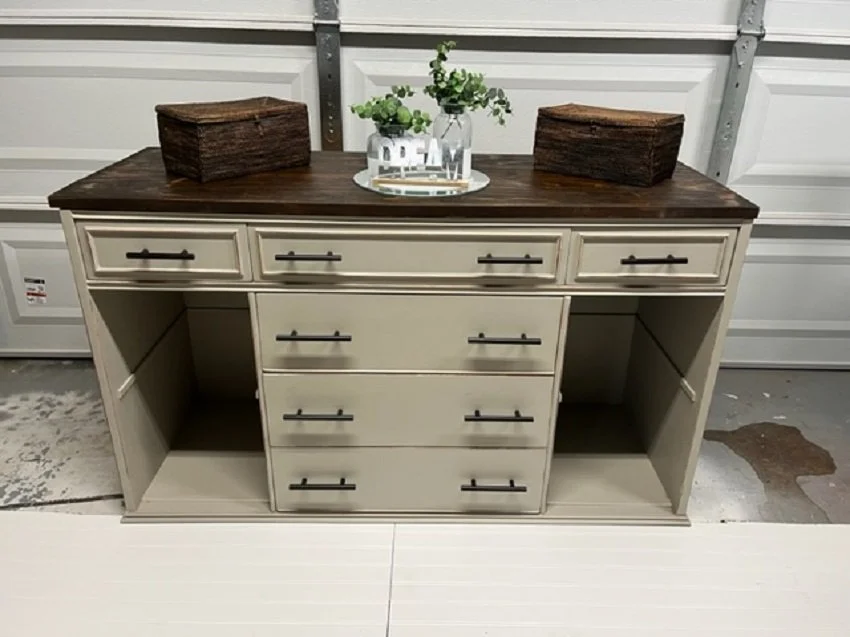
Now I think I’ll be able to find a new home for her!
Now, what will you do next to love where you live?
Please feel free to reach out to us at The Redesign Habit and ask questions or simply share a project that you are working on or have completed.
For more great stories and ideas please follow us on Facebook and Instagram.