The Tale of the $5 Hutch
I love thrifting! Especially when it leads to stories like the one I’m about to share – The Tale of the Five Dollar Hutch. Sometimes lady luck shines on you, and you find such a great piece at such a great price you can barely believe it. In the first stroke of luck, I was actually thrifting for a client seeking a hutch for her business to add extra storage. I decided to check the Habitat for Humanity Restore close to where I live, another lucky stroke, and it turned out better than imagined. They were having a liquidation sale that day to get rid of extra inventory. After finding the right hutch more my client, I saw this little beauty in the parking lot…
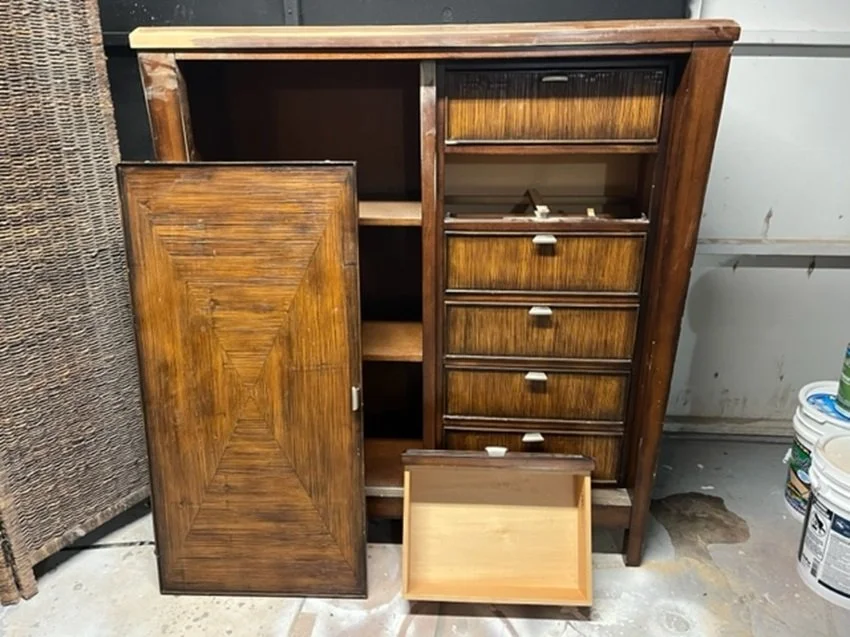
I touched the hutch door and it actually fell off. If you think that was unlucky, you’d be wrong. A worker saw what happened and said, “Hey, as is, you can have it for $5.” So, I did! (Really, how could I not?)
The tale of lucky beginnings leads to what I believe is a piece so dashing I showcase it in my dining room. Let me now share the steps to get it in shape, from start to finish.
Hutch Makeover Steps
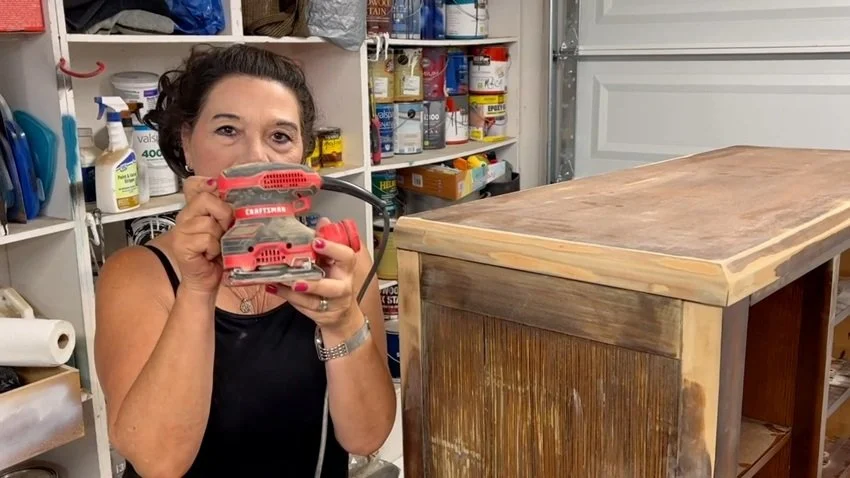
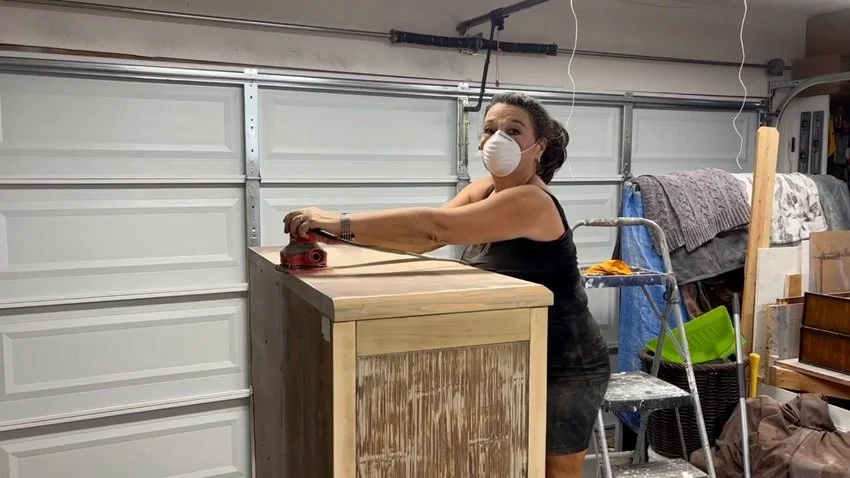
1. Sand. Almost always the first step to refinishing something is sanding. In this case I used my palm sander and 60 grit paper to remove as much of the existing finish as possible.
Like what you’re reading?
Subscribe to the blog for more redesign tips and project delivered straight to your inbox!
2. Clean. After the sanding, it’s so important to remove the dust and grime left behind before you move forward with your new finish.
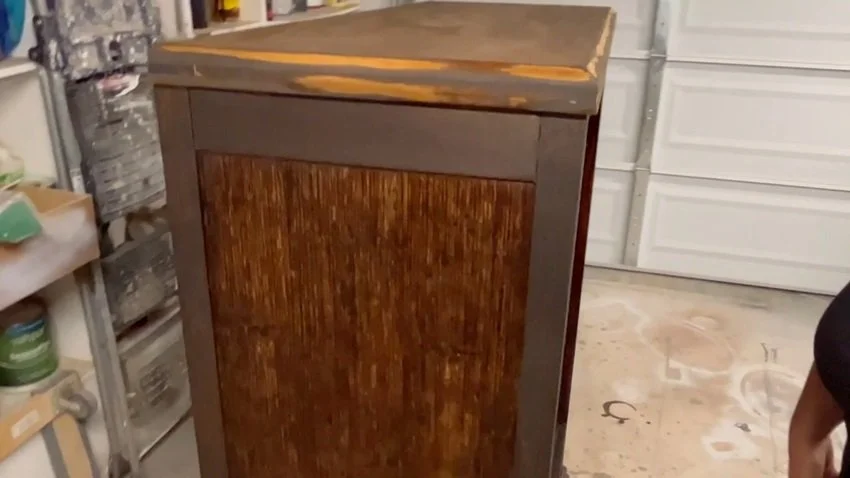
3. Apply the new finish. I opted for an antiqued/lightly distressed look for the piece because she had some flaws that would be hard to repair. I made the decision to just go with the flaws – like they say, it adds character. To achieve the finish I wanted, I used a blend of stain and paint to create an antique look. However, not on the whole piece. The top was so gorgeous, I just stained it.
4. Apply the sealer. Once I had finessed the finish to give the hutch a great personality, I gave her two coats of polyurethane – from top to bottom.
5. Determine the Door Treatment. The piece featured a gorgeous door designed to hang from a track allowing it to slide from one side to the other. However, when we tried to reattach it, we found the track too bent to use. I opted to leave the door off. This was another bit of luck as the drawers of the hutch look great and the shelves make for elegant open storage. Never fear, I will find a use for that door some day and will be sure to share that project with you.
6. Move it. Did I mention this piece is really big? And awkward. And heavy! We had considered quite a few options for moving it into my dining room, finally opting to taking it for a ride outside house and through the front door. Much further but easier and less risky. PRO TIP: Make sure you plan in advance how to get a bigger piece into your desired space BEFORE you go to all the trouble of refinishing it. We knew it would fit but in some earlier homes it could have been a “no go.”
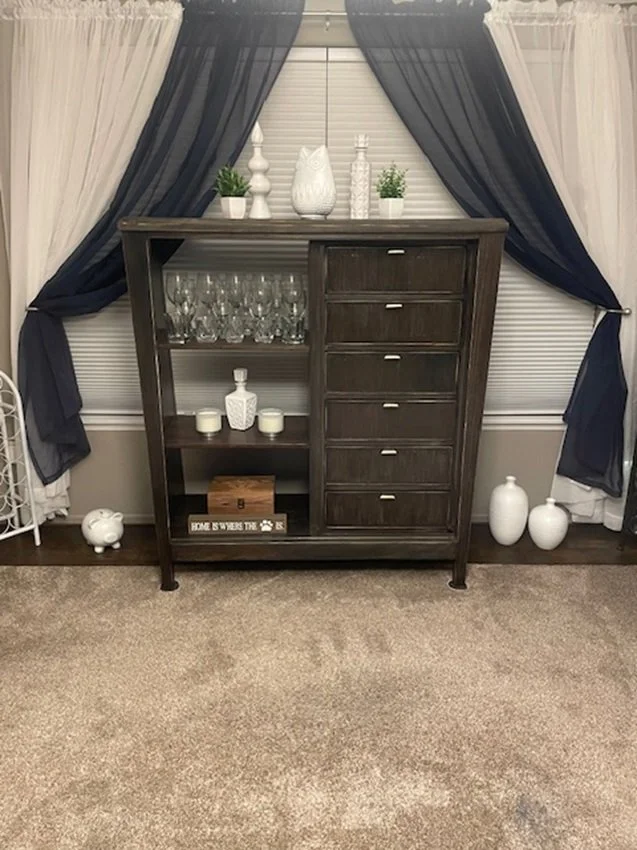
The Big Reveal
Below is the finished product and we couldn’t be happier! She turned out great and it felt extra rewarding to save her from the scrap pile and give her a new life in our home. If you look closely, you can see that she isn’t perfect but who among us is?
I hope this inspires you to give a furniture refinishing a try. It’s fun to hunt for the perfect piece. Nothing beats the feeling when you find that perfect piece at an incredible price. You get to save money and flex your creative muscles!
Now, what will you do next to love where you live?
Please feel free to reach out to us at The Redesign Habit and ask questions or simply share a project that you are working on or have completed.
For more great stories and ideas please follow us on Facebook and Instagram.