Thrift Store Bench Makeover
It won’t always be like this, but lately I’ve been on a thrift store streak. I scored a sweet little bench with a cushioned top and front drawer for storage for less than 10 bucks! As is my habit, a few Saturdays ago, I checked my local Goodwill to see if they had anything I couldn’t live without. Apparently, my survival depended on a cheap bench. It wasn’t much to look at, but I could see its potential and the price was too tempting to resist.
While I gave in to impulse, my motivation was about sharing with you. Okay, a little about replacing the bench I’d grown tired of in my primary bedroom, but also the sharing thing. Read on to follow the steps I took to create a cute piece for a killer price.

DIY Bench Makeover: Step-by-Step
1. Assess. I always spend a few days looking over a new piece when I get it, trying to figure out what needs to be done to fix it and exactly how I want it to look.
This piece had a cushion covered in red vinyl. Nope. I knew that wouldn’t last, so I had to figure out how to remove the top. The body of the bench is particle board covered with a wood veneer in that lovely 90’s oak color we can’t seem to escape decades later. Nope. Goodbye orangey oak. The inside bottom of the drawer was damaged beyond repair so fixing it was added to my to-do list.

2. Clean: This step is simple but important for quality refinishing results. Wipe down the piece with a damp cloth to remove cobwebs and dust to help ensure that your new finish will look its best.
3. Remove the cushion. Refinishing the body of the piece is much easier if your cushion is out of the way before you start. In this case, I wasn’t able to remove it easily. I conferred with hubby to figure out exactly how it was secured on. After a little disassembly we removed the top. Although it’s not always the case, because I planned to recover the cushion anyway there was no need to be especially careful with this step.

4. Refinish the body. First, I removed the silver handle on the drawer and sprayed it bronze. Next I began painting using my tried-and-true antiquing method. This technique not only hides any blemishes the piece may have but the finished product looks like solid wood, a bonus on a particle board piece like this. When painting was complete, I did some light distressing to the piece with fine grade sandpaper. If you’re interested in my process for doing this, be sure to follow my YouTube channel to see tutorial videos, coming soon.
5. Recover the cushion and line the drawer. After removing the red vinyl covering (there were actually two layers of covering but I only removed the outer one) and using fabric I had on hand, I recovered the cushion. Next, I got rid of the drawer damage by creating a new false bottom using cardboard, a spray can of tacky glue, and some of the cushion fabric.
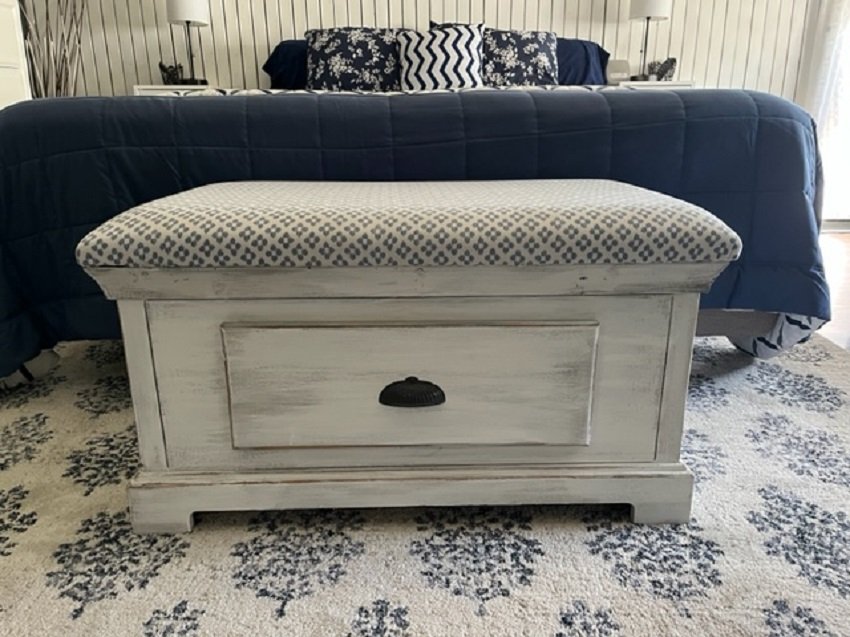
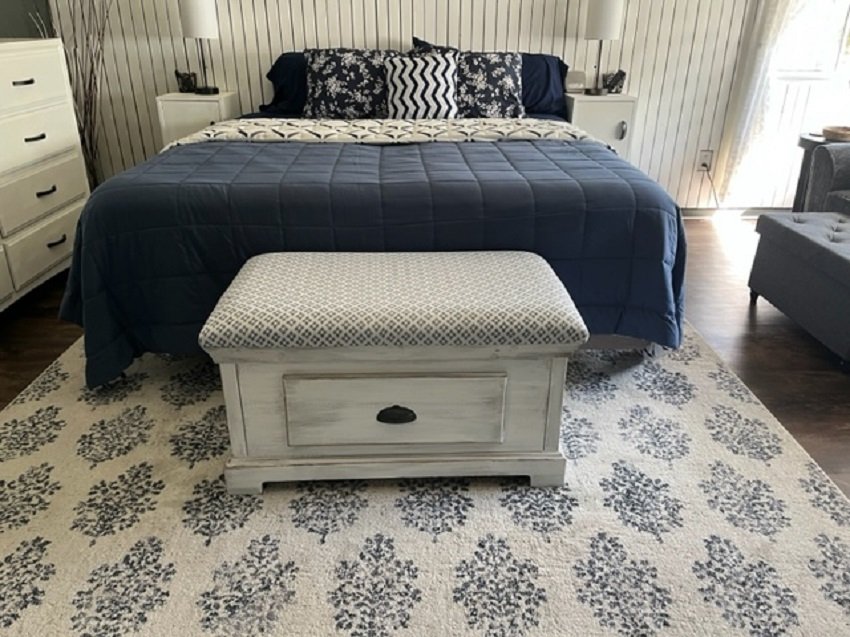
6. Reassemble. Once all the work was completed, I put everything back together, stepped back and admired the cuteness I had created.
Final Thoughts on the Thrift Store Redesign
You can see from the pictures that it really turned out pretty nice for an investment of only $9.99. I literally had everything I needed for this project already, so no additional money was spent. This is why I always suggest that you keep leftover paint, fabric, hardware, etc., because you never know when you’ll have a future project where it may come in handy. This is a great starter project if you want to get started in the world of redesign. It shows how drastically different you can make a piece look with a little paint, creativity, and effort.
Now, what will you do next to love where you live?
Be sure to visit The Redesign Habit to share your redesign stories or reach out with your questions. We’d love to hear what you’re working on.
For more great stories and ideas please follow us on Facebook, Instagram, and subscribe to our YouTube Channel.