Before You Carve That Pumpkin...
I have nothing against a good old-fashioned jack-o'-lantern. But the minute you cut into a pumpkin, the clock starts ticking. Suddenly that perfectly good pumpkin has a much shorter decorating life - and after all that scooping, carving and seed-covered-kitchen-counter business, it seems a little rude.
So a few years ago, I started playing with another idea: What if I decorated the pumpkins instead?
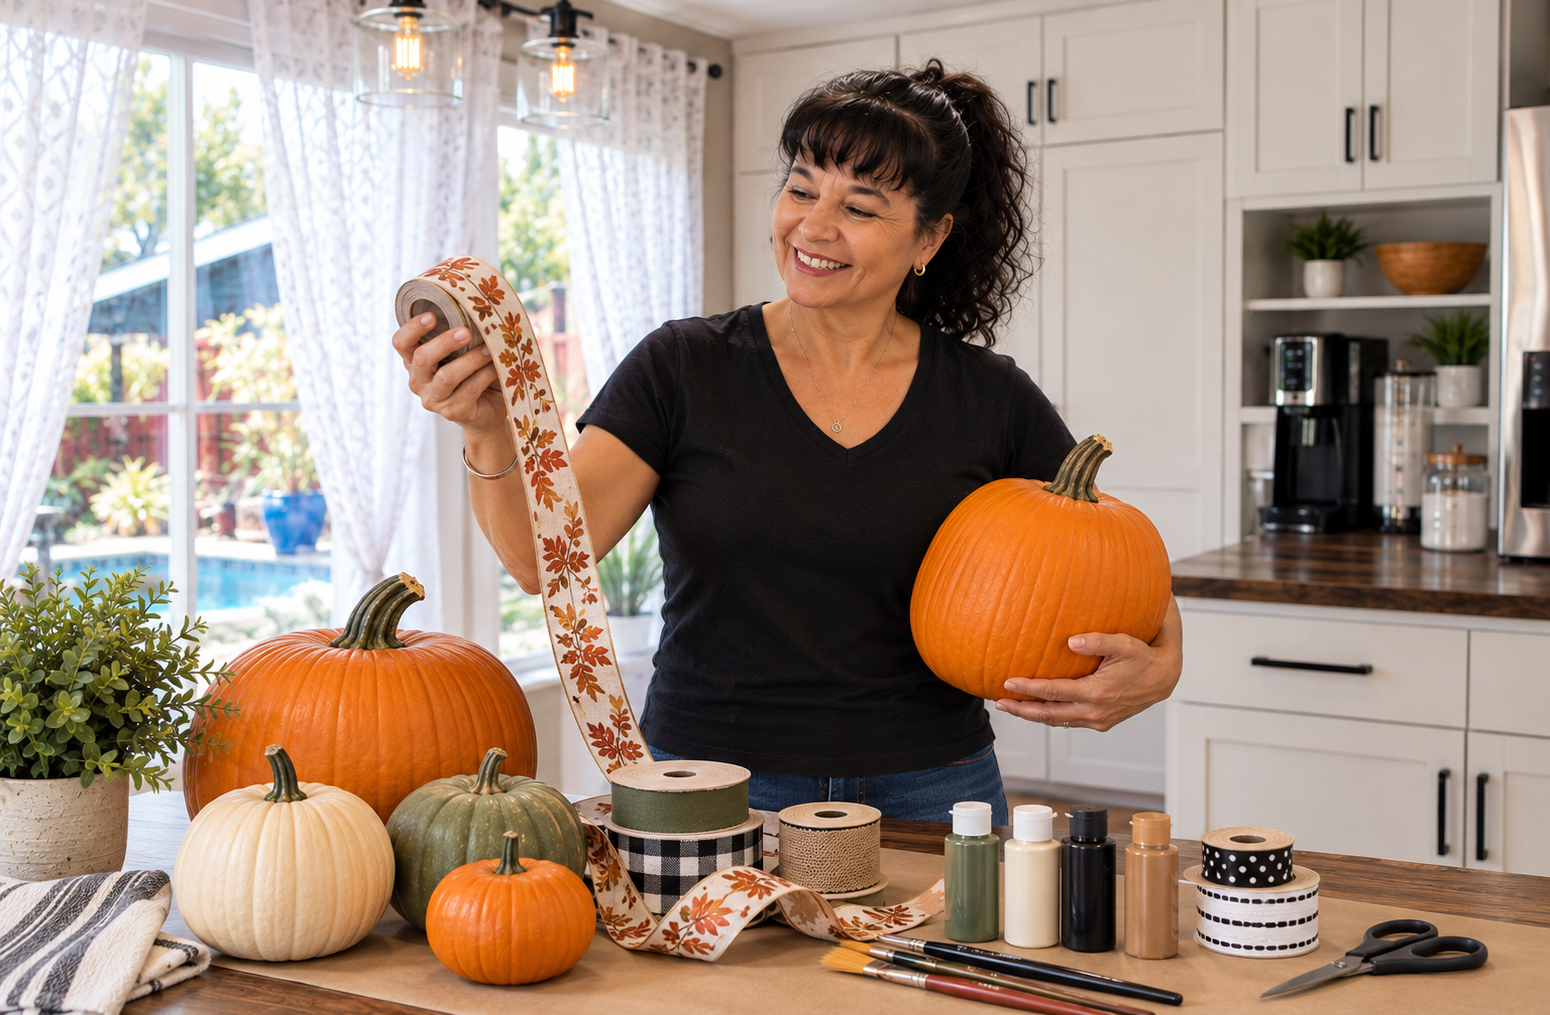
Paint them. Wrap them in ribbon. Add decorative tape. Stick a few plastic spiders into one. (Yes, literally stick them in. We are not overcomplicating this.) Besides being easier, decorating rather than carving gives you a lot more freedom. Your pumpkins don't have to be orange. They don't have to be spooky. And they definitely don't have to disappear on November 1.
They can coordinate with your home, work with the colors you're already using for fall, and - if you skip the BOOs, EEKs and plastic spiders - carry you right through Thanksgiving.
The last time I played around with this idea, I made so many decorated pumpkins that I eventually gave most of them to friends who owned a dance studio so they could use them there. Apparently, even pumpkins need an exit strategy.
So this time, I'm not making another dozen pumpkins. I'm pulling out some of my favorite ideas from that original project and looking at them with fresh eyes - because the techniques still work, and there are plenty of ways to update them for the colors and style you love today.
And the best part?
Not a carving knife in sight.
Start With the Easy Stuff
Let's establish something right up front: you do not need a cart full of expensive craft supplies to do this.
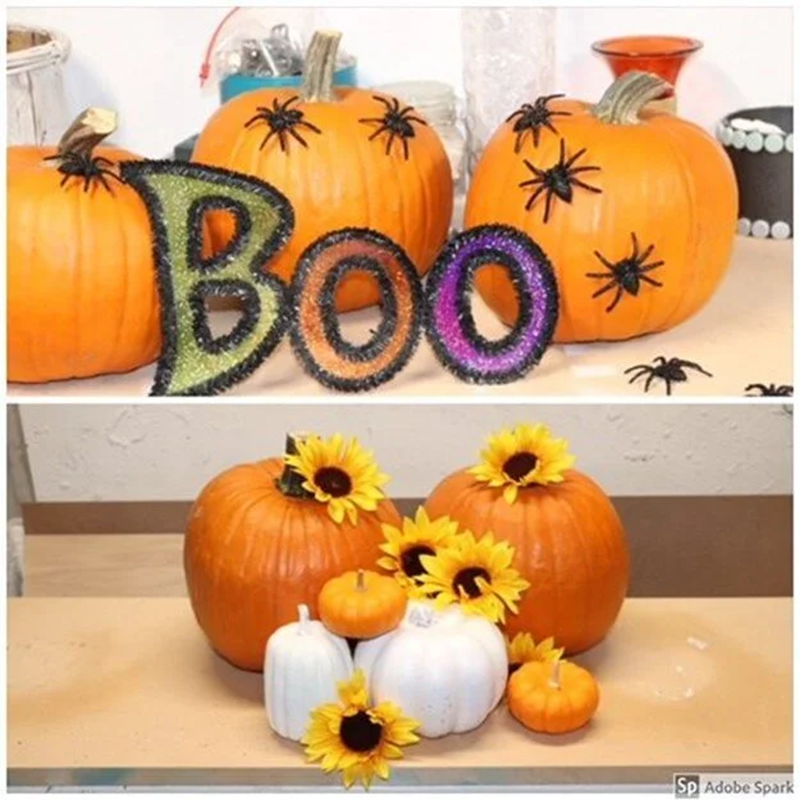
When I made these pumpkins, most of what I used came straight from the dollar store. The faux flowers, ribbon, little BOO sign, craft paint and other embellishments were inexpensive finds. The goal wasn't to create heirloom pumpkins. It was to have some fun and see what I could do with a few dollars and a little imagination.
And some of these barely qualify as projects. Those plastic spiders? I simply pushed them right into the pumpkin. That's it. No glue gun. No elaborate tutorial. No twelve-step process involving materials you've never heard of.
For another pumpkin, I tucked faux flowers around the stem. Add a little sign, tie on some ribbon, or combine a few inexpensive elements and suddenly a plain pumpkin has some personality.
And here's where you get to decide whether you're decorating for Halloween or for fall. Spiders and BOOs obviously lean spooky. Flowers and pretty ribbon can stay out much longer. Choose embellishments that suit your home and the season you're actually decorating for.
Cheap. Easy. Removable. And nobody had to gut a pumpkin.
Paint It
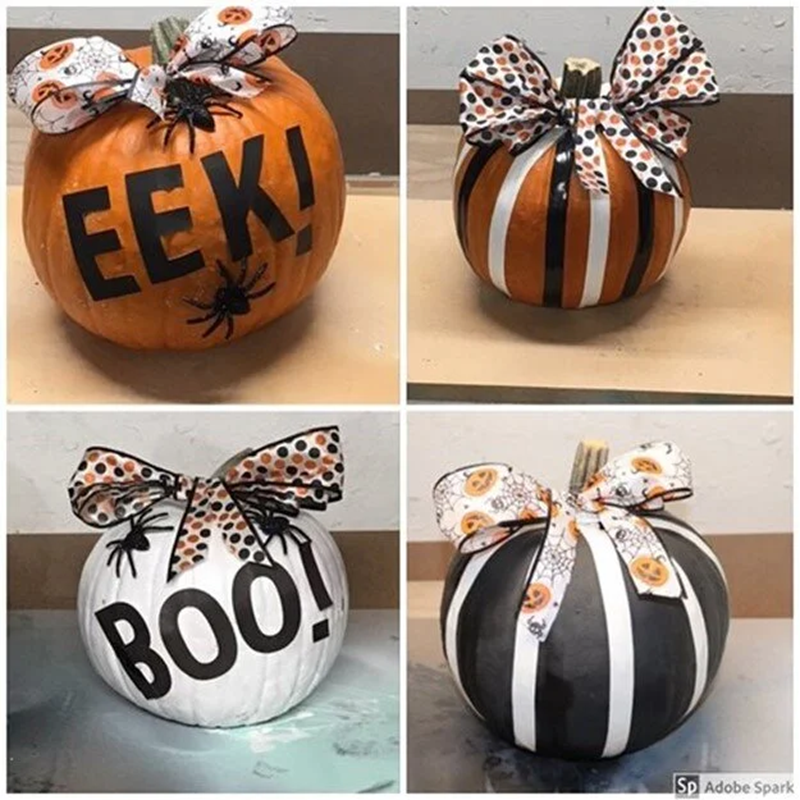
Paint may be one of the easiest ways to completely change the personality of a pumpkin - and you don't need anything fancy to do it. The pumpkins I decorated here were done with inexpensive craft paint, much of it straight from the dollar store.
You can paint the entire pumpkin, add stripes, dots or simple lettering, or combine several ideas. I played with black and white, painted big BOOs and EEKs, added stripes and basically treated each pumpkin like a little blank canvas.
And don't worry if lettering isn't your thing. You don't need perfect handwriting - or even particularly straight stripes. Painter's tape can help create clean lines, and inexpensive letter stencils are another easy option. You can usually find those at the dollar store too. Simple shapes or patterns can be just as effective.
The colors are entirely up to you, too. I was having a definite black-and-white Halloween moment when I made these, but there's no reason you have to be. If I were doing another batch today, I might reach for cream, mushroom, sage, muted rust or other colors that work with the rest of my fall decor.
That's one of my favorite things about painting pumpkins: the pumpkin doesn't get to choose your color palette. You do.
Want something playful and spooky? Go for it. Want something quieter that can sit on a table well past Halloween? Skip the BOO and choose colors and patterns that simply say fall.
And please don't let the word paint convince you that you need artistic talent for any of this.
If you can hold a paintbrush, you can paint a pumpkin. We're not restoring the Sistine Chapel here.
Wrap It Up
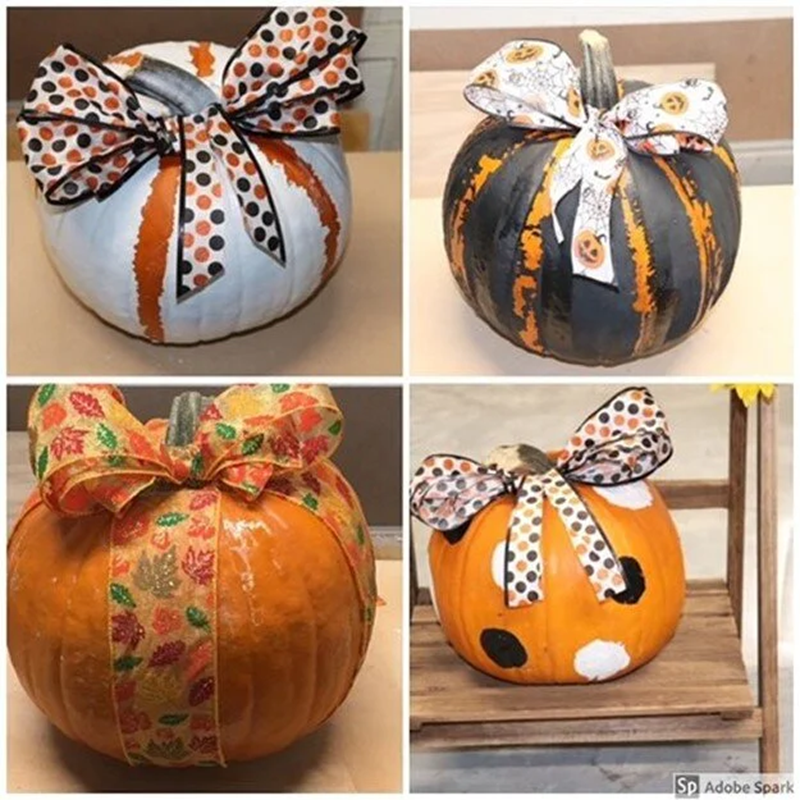
Ribbon may be the easiest way to take a pumpkin from Halloween decoration to fall decoration - and that's a distinction I really like.
A carved jack-o'-lantern has a definite expiration date. And depending on the weather, it may decide that expiration date is October 27th. But leave the pumpkin intact and decorate it with ribbon instead, and there's no reason it can't still be part of your decor at Thanksgiving.
Run ribbon vertically from the stem to the bottom, wrap it around the middle, tie a bow at the top or combine a couple of patterns. In some of my original pumpkins, the ribbon did almost all the work. And once again, there was nothing fancy involved. Much of the ribbon I used came straight from the dollar store.
Decorative tape works much the same way. Use it to create stripes, bands or simple patterns. Mix widths or designs if you want a little more personality. And if you put a strip somewhere and hate it?
Peel it off. There. Tutorial complete.
The trick is simply to think beyond Halloween when you're choosing your ribbon or tape. Plaids, checks, stripes, metallics, warm neutrals and traditional fall colors can work throughout the entire season. Choose something that coordinates with your home and suddenly the pumpkin doesn't feel like a Halloween prop - it just feels like part of your fall decor.
And that's really the beauty of leaving the carving knife in the drawer. The calendar can flip to November, and your pumpkins don't have to go anywhere. Unless, of course, you've decorated twelve of them and need to find a dance studio willing to take a few off your hands.
Give the Carving Knife a Break
There will always be a place for a good jack-o'-lantern. But sometimes it's fun to let the pumpkin stick around a little longer.
Grab some paint, ribbon, decorative tape - or whatever inexpensive little treasure catches your eye - and make it your own. And if you get a little carried away and end up with twelve decorated pumpkins? I happen to know a dance studio.
Now, what will you do next to love where you live?
Be sure to visit The Redesign Habit to share your redesign stories or reach out with your questions. We’d love to hear what you’re working on.
For more great stories and ideas please follow us on Facebook, Instagram, and subscribe to our YouTube Channel.